So I built a speaker cab...Part 3
- Alex S

- Dec 6, 2016
- 8 min read
So...at this stage you should be able to install the speaker onto the baffle. This is a relatively easy process, assuming that the hole has been properly sized. I used T-nuts and bolts to bolt down my speaker to the baffle. Figure out what sized bolts you need for your speaker (they are probably standard sized for all 12" speakers), then order them online. I got my set from Decibel HiFi. To install those things, place your speaker on top of the baffle where it is to go, and then mark several positions where you would like to install the bolts. Drill appropriately sized holes (for the bolts) in those positions and install the T-nuts.
So at this stage, it's time to dry fit everything and make sure there are no mistakes. Consider that there needs to be enough space left for the Tolex and the grille cloth, so your baffle shouldn't be too snug. You should have at least a few millimeters of clearance all around.

At this point in the build, you should have:
The box frame of the cabinet with all edges rounded over and finished to 120 grit
The baffle fitted with a grille cloth spacer, and the speaker you intend to use. It should also have a T-Nut in each corner so that it can be mounted into the cabinet
The rear panel fitted with screw holes in all the intended locations
Mounts for the rear panel and baffle screwed into the cabinet but not glued yet. Their positions have been marked with a pencil
All the separate components listed above have been fitted together and you are happy with their positioning
Once you're confident and happy with your work, unscrew the mounts on the inside and glue them up. Make sure they line up with the pencil marks - just apply glue and screw in the same wood screws used. Do them one at a time so that you do not mix up the mounts.
Congratulations, you're pretty much halfway there!

If you are dying to hear how the cab sounds, then you can wire up the speaker and try it out at this stage. without the grille cloth and the tolex it will not sound exactly accurate but it would be pretty close.
Moving on with the build, it's time to unscrew the baffle from the cabinet, and remove the speaker. The entire baffle will need to be spray painted black so that it doesn't show through the grille cloth. Do this for the front and back of the baffle. I used a matte black spray paint, the cheapest I could find.
Remove the back panel as well and spray the inside of that black. similarly, spray the inside of the box frame black too. There's no need to be accurate with the spray painting because the outside will be covered up with tolex. I would do at least 3 coats of paint on all surfaces mentioned above.
The photo below shows the cabinet after it has been spray painted and reassembled. I tested it out at this stage by hooking it up to the Princeton 65RI. There's no need to remove the head like that, I had it out for some other reason. Just connect the speaker using speaker wire to the speaker out jack of your amp. Listen out for any rattles or buzzing...anything that can be attributed to the way that it is constructed. Any repairs should be done as early as possible - there's no point tolex-ing or going any further if it sounds awful.

If all is well, you're pretty much on the home stretch. Everything from here on out will be basically cosmetics and should not change the sound drastically.
At this stage you can also install the speaker jack onto the back panel. I used a simple Input Jack Recessed Cup Plate, a speaker input jack and soldered some vintage speaker wire that I had lying around. I would solder the other end to the speaker terminals once build is complete.
It is also time to fit the handle and feet. I picked a handle that uses T-nuts and bolts. This will support the cabinet from the bottom of the top board, rather than relying on the screw threads to bare wood. I'm sure the handles that use screw threads alone are strong enough though. Installing the feet and handle is pretty self explanatory and I don't feel I need to get into detail here. However it's important to do this step before applying tolex, so that the holes are all there and ready to use. If you drill the holes AFTER tolex has been applied you run the risk of ruining your Tolex finish. I don't think it will, but why run that risk.
Guess what? It's Tolex time.
Applying Tolex
Ho boy....where can I start. This is a new skill for me but let even though it looks daunting, I think most people would be able to do a good job with it if they are patient and careful. First let's list out the tools and materials needed:
Tolex - figuring how much you need will depend on the method you decide to wrap with. More on this later.
A sharp knife - I used a Stanley retractable with a new blade. This is critical. Do not try and skimp on blades...if it becomes dull, or if it gets tacky with glue residue, change that blade.
Contact adhesive - I used Selleys Kwik Grip Waterbased Contact Cement.
A long steel ruler
A cutting surface
An upholstery or wallpaper roller
See? That's not that bad...
OK so there are a few methods of wrapping a cab in tolex. The two most popular ones as I have found out are the Fender style and (I think) a Marshall one. I decided to go with the Fender technique, mainly because this is how my Princeton is wrapped and at least I will have a point of reference. This technique does use more Tolex though, so keep that in mind.
I'm not going to go into the details of the wrapping technique here. There are plenty of other references and Youtube that should have that information. I will just do a quick rundown on the steps
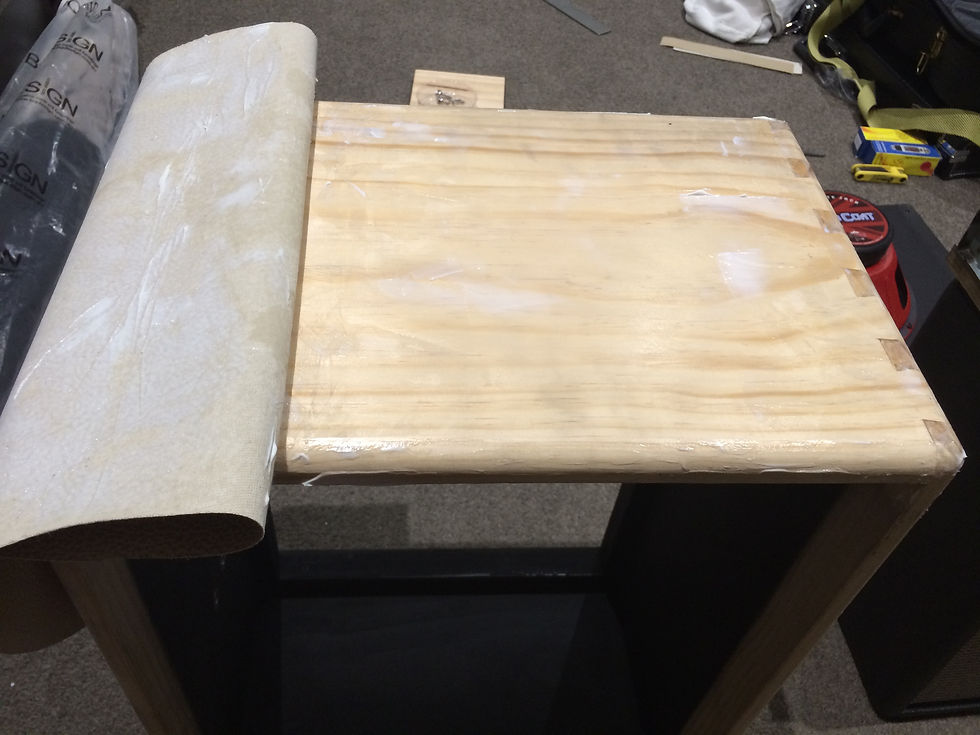
Cut out your tolex to the right size(s) as required by your chosen wrapping method. In my case I needed 4 separate sheets for the cab, 1 sheet for the backing panel.
Apply contact cement and wait till both the tolex and the cabinet are tacky to the touch.
Glue the sheets of tolex and cut/manipulate corners as required using the sharp knife. Use the upholstery roller all over the tolex to ensure good adhesion.
Wait until the contact cement has cured/set.
Once the contact cement has set, it's time to do a dry fit again and correct any issues that you may find. If you have allowed enough clearance, everything should fit together nicely.
Installing the grille cloth
Tools needed:
Grille cloth
A sharp knife
Staple gun
Pliers and a flat head screwdriver for removing staples
Optional clamping rig
Optional heat source such as hair dryer
Remove the speaker from the baffle, and place it on your grille cloth material. Cut the grille cloth to size, such that there is enough material to fold over and staple. Let's say, 4 inches on each side.
Check that the baffle is in the centre again, and that it is "face" down (the face being the side with the grille cloth spacers). Also check that it is level with the baffle, as the grille clothe often has horizontal lines that need to be level with the top and bottom of the baffle. This is the most challenging aspect because it has to not only be pulled tight but it also has to be consistently tight and level across the whole baffle board.
Once you are happy with the position, clamp the baffle board down such that the grille cloth is fixed in this position. If you don't have a place or rig to clamp it to, you will have to forego this step. It is doable but you just have to be careful. Next, cut the grille cloth such that each corner has a square cut out, like so:
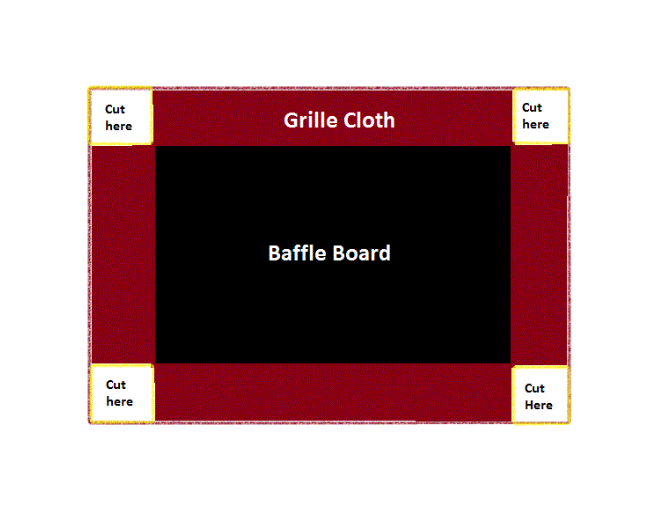
Then, fold over the first side - I would start with one of the long sides and start putting down some staples. Put down enough such that it can hold the grille cloth with enough strength while you pull it taut on its adjacent side. Try and stay away from the corners because they will be cut for a mitred corner later. If you do put a stapler too close to the corner though, don't worry as it can be removed later. At this stage don't worry if your grille cloth overlaps or comes close to the hole in your baffle board, as we will be cutting it later.
This next part is optional but you can try it and it may help, depending on the material of your grille cloth. Take a hair dryer and heat up the grille cloth, all across the central portion. This will make it more pliable and easier to stretch.
Once that is done, stretch out the adjacent side to the first stapled side and staple it down exactly as how you have done to the first side. Again, remember to put enough staples and to make sure the grille cloth is properly aligned even after stretching. If it is not, it's time to remove some staples and redo it.
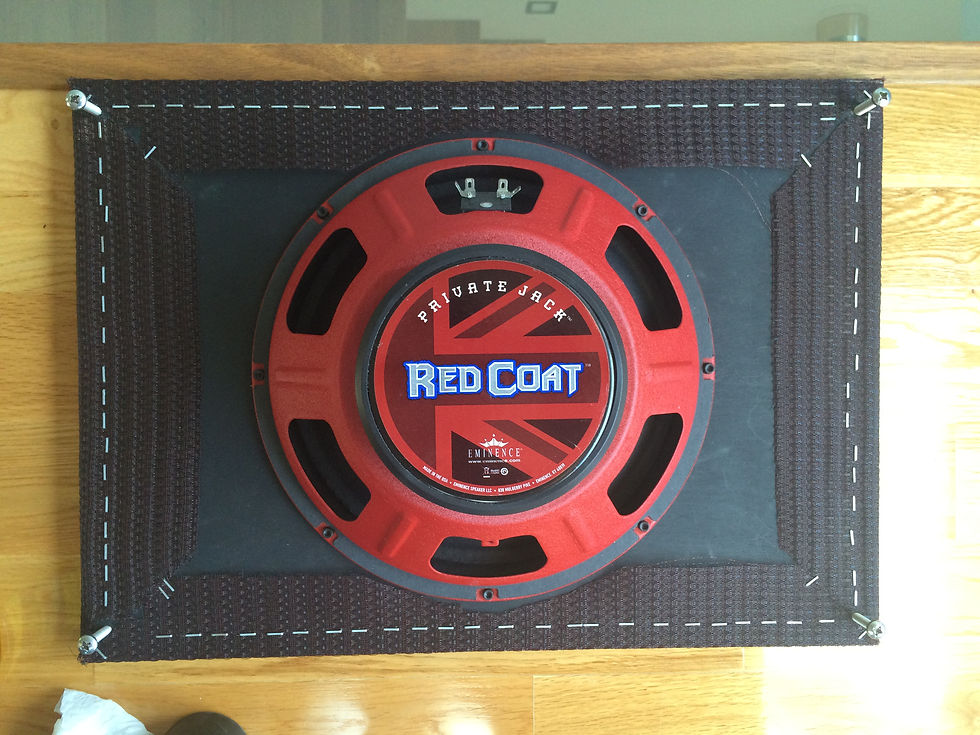
Repeat the process for the two remaining sides and you will have a nicely stretched out and secured grille cloth. Now all that needs to be done is to mitre the corners. If you have been following the instructions above you will find the corners overlapped on top of each other. To mitre them, get a very sharp knife and run it from the corner to the centre of the baffle board. This should create a diagonal cut and the waste can then be removed such that there is no overlap. After that is done, staple the corners so that they are secure.
Place your speaker in position and if there is grille cloth getting in between your speaker and the baffle board, make sure you cut it out. There should be nothing in between your speaker and the baffle board, it should have full contact.
You may also need to cut out some holes where your bolts to attach the baffle board goes. Use an awl and a knife for this. My completed baffle board:
Leather corner protectors
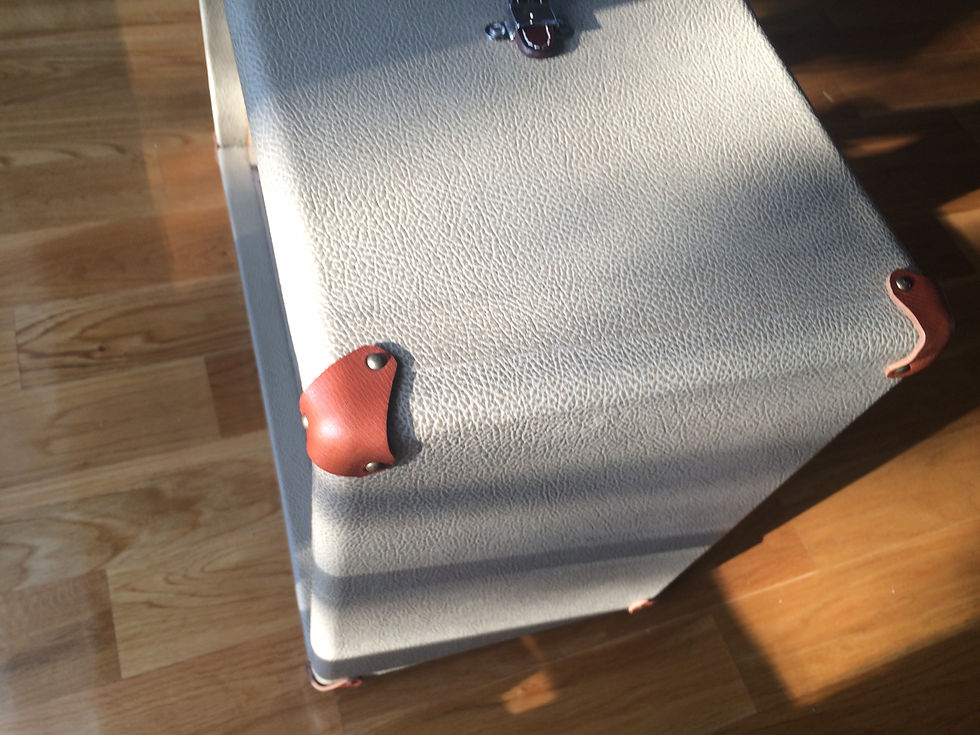
The corner protectors are to complete the Mesa Boogie ripoff look. I used veg tanned leather from https://leather4craft.co.uk/. The thickness was 2.5mm and the colour used was called "London Tan".
Cut triangles to size depending on the size of your corners and how big you want the corner protectors to be. The angles to form the triangles that I used were 90 degrees and 2 x 45 degrees. I cannot remember the exact measurements I used. After you have cut 4 (or more, for spares) equal sized triangles, round the corners of each triangle. U can use a leather worker tool such as a corner punch, or you can just use a scissors or knife like I did.
The leather pieces will need to be wet molded to fit the corners of the cabinet. I had a dummy corner made and wet molded it on that. The process is simply soaking the leather pieces then molding/stretching it to the corner and attaching it using upholstery tacks. Remove the leather corners from the dummy corner once dry and install it onto the cabinet.
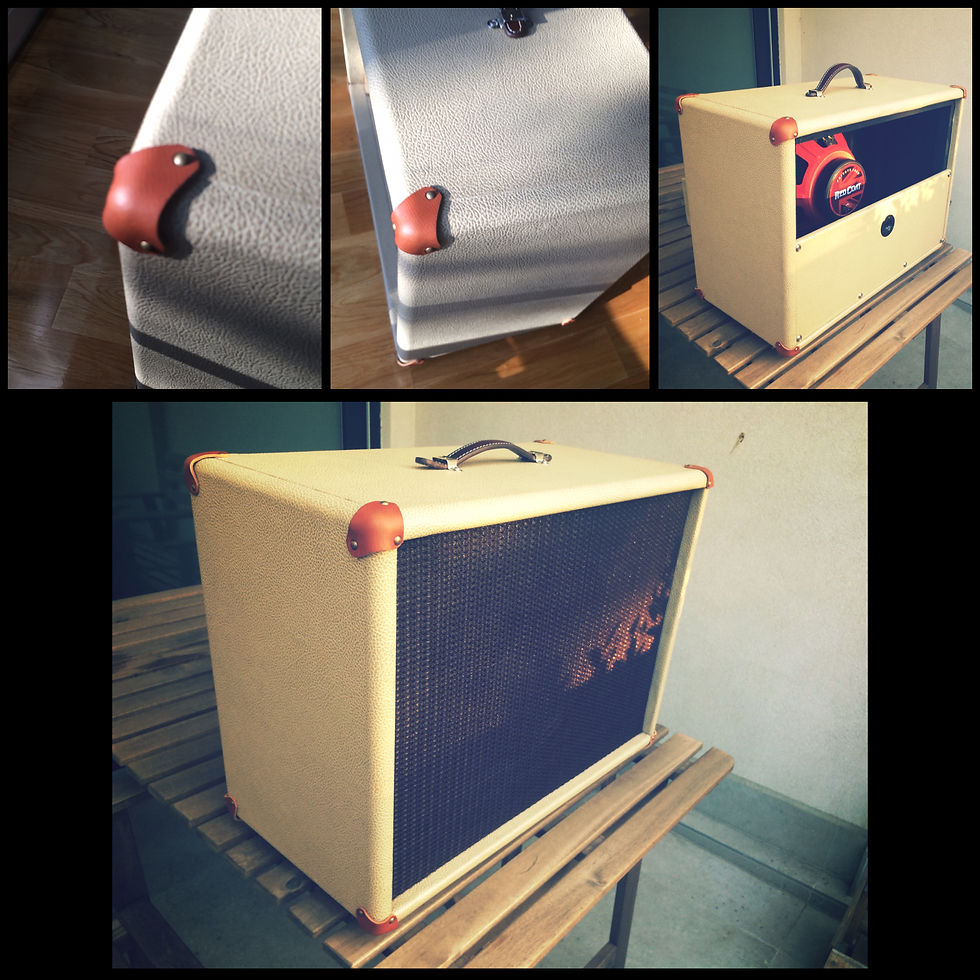
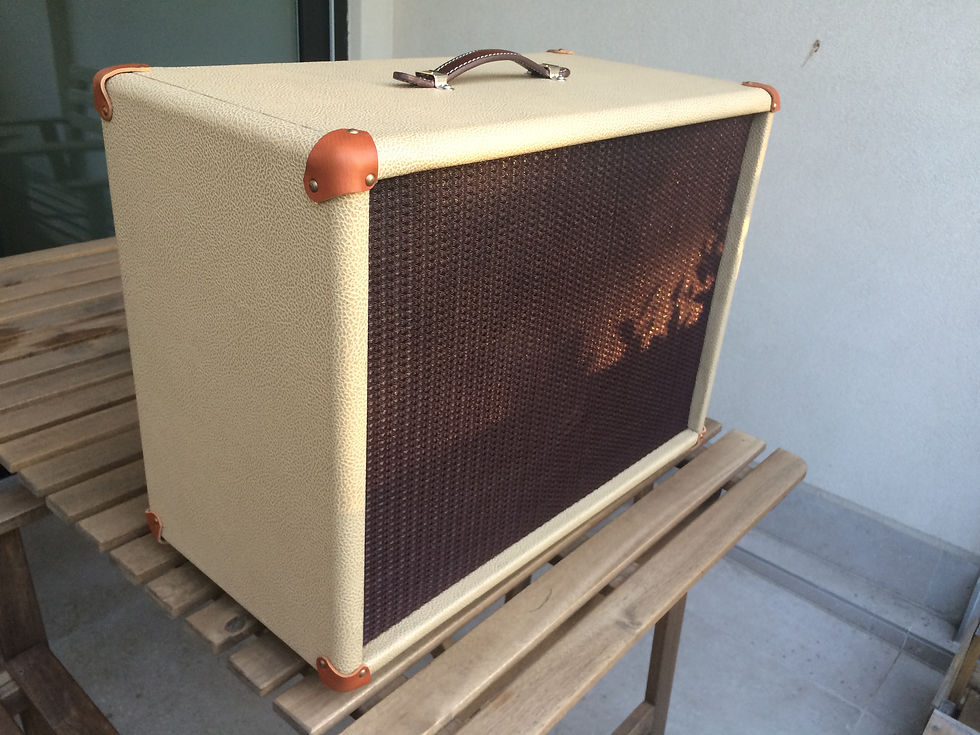
The finished product
After all that is done, it's time to assemble everything and solder in the speaker. Then, take your time getting to know your new speaker cabinet!



Comments