More Fernandes Sustainer info
- Alex S

- Oct 14, 2021
- 5 min read
Updated: Apr 10
It's been a while now since I purchased my Fernandes FR-95S from Japan. So I thought I would update this blog with the latest on this guitar. I have done quite a lot of work to it but this blog post will speak specifically to some if the onboard electronics.
I am by no means an electronics expert - I struggle through and most of the time I'll get a result but I'm a beginner at best. That's why I have included lots of photos, hopefully these are helpful for anyone reading the blog and wanting to know more about what's in these guitars.
The list of upgrades that I have done to this guitar is (in bold is what I have included in pics here):
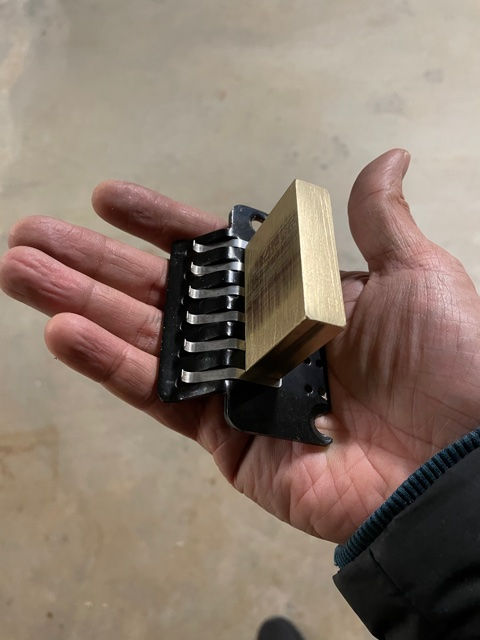
Created a custom trem block for the tiny pot metal bridge
Replaced both pickups
Shielded cavities with copper tape as well as conductive paint
Full setup including fret level and dress
There are a lot of electronic components to this guitar and even though the noise is not unbearable, it is probably one of my noisier guitars. Even though I shield most of my guitars, I do them out of habit rather than anything else. I don't actually think it helps with noise all that much. In the case of this guitar I had hopes (as I always do) but of course it is still noisy. Shielding cavities is actually probably more trouble than it is worth if I'm being honest but if you've got the materials and idle hands....well, that's a bad combination :)
Here's a look at the size of the unshielded control cavity:

And here is a pic I took post-shielding. It's also a clear shot of the volume pot and switch which remain stock. The pots are fine, I mostly change pots if they feel cheap or if I think they are not the right value for what I think the guitar should sound like - in this case I opted to stick with the originals.

Here's a shot of the push-push pot that also serves as a Master Tone. Nothing special about this pot either - which is good because it means it can be easily replaced if it fails. To be honest, with this guitar I don't think the push-push pot is really needed. I don't find myself EVER splitting the humbucker.

You can see in the shot above as well the not-so-great job Fernandes did with their soldering and wiring. I actually had to resolder that white wire that goes to the white connector on the other side of the PCB.
And, if you haven't guessed it by now, that white connector connects to the humbucker. Here's a shot of the stock humbucker's leads. As you can see it only has 3 of them - the one I'm holding with my fingers is not actually coming from the pickup (it goes to the push-push pot). The 3 wires are red, black and white. One for ground, one for hot and one for split.

So in order to upgrade the pickups, I would have to wire the pickup into this connector. My choices were:
Get a crimping tool and prepare the leads of the new pickup so that they feed directly into this white connector AKA "the RIGHT way"
Snip the leads going from the old pickup into the connector, then solder the new pickups leads to the newly snipped/exposed wires. Obviously I chose this way because I'm lazy.
I did make sure to use heat shrink and make it as neat as possible, but let's be honest - it is a pretty "bodge" way to do it. It does work of course...until it doesn't!
As for the choice of humbucker...there's some material out there from Fernandes that states that it should work with other manufacturer pickups. The examples they gave were Seymour Duncan, Dimarzio and EMG. I have a feeling they would work with any pickup, but not knowing the ins and outs of the whole sustainer system at the time I decided to go with Seymour Duncan and follow the instructions I found. The instructions (I think it was for the Sustainer kit) said that Seymour Duncans had to be "turned 180 degrees" or taken apart and "flip the magnet around 180 degrees". I took that to mean that the polarity had to be reversed so I flipped the magnet in order to do that. Not sure that it wouldn't have worked had I NOT done that though....
OK so that's the humbucker. As for the single coil, it is actually not connected to the PCB at all. The sustainer system works between the sustainer "driver" i.e. the thing that looks like a neck pickup, and the bridge humbucker. The driver vibrates the string and the bridge pickup picks up the vibrations to turn it into electric signals. The middle single coil is not part of this equation at all and in fact when you flick the sustainer switch to ON (i.e. the driver is working) it automatically switches to bridge pickup no matter what position your switch is in.
Speaking of the switch, here's another picture of it. Quite a nice unit, before things were made super cheap and encased in plastic. It's a 3 way switch: position 1 selects the single coil, position 2 selects both single and humbucker, position 3 selects the humbucker only.


Right, now we can move on to the sustainer itself. Well, in this model it is soldered directly onto the PCB. A few pictures of it are shown below. I did not make ANY changes to this and I left the board and sustainer well alone.
You can also see the 2 trimpots that I mentioned in my previous post. I still have not figured out exactly what they do (they're not labelled) if I had to guess they are
VBC or Vibration Control - to increase the sustainer's "attack". Your guess is as good as mine as to what exactly that means
MBC or Balance Control - balances the output between the standard (fundamental) and harmonic mode
I'm guessing the AOC or the gain control is the pot that is controlled from the front of the guitar and FGC or output control does not apply here since this Sustainer only operates as a driver and not a pickup too.


For those that are curious, here is what the "front" of the PCB looks like:

You can see that both mini switches are attached directly to the board. We've got connectors going to the Sustainer Gain control pot, the bridge pickup and the power supply. Remember the sustainer driver is soldered on and does not have its own connector.
Alright, that ends the second tour of the Fernandes. I'll probably do another post about the bridge modification purely because of the amount of work that went into that one.
Adios.
This post contains affiliate links. If you click through and make a purchase, I may earn a small commission at no extra cost to you.
Links to other Fernandes Blog Posts:


Hey. Thank you very much for the report. Been visiting this website over and over again in the last few days since no one else seems to deal with this exact model.
I happen to have a FR95S too. Bought it used a couple of weeks ago in great physical condition. Seller mentioned output issues (guitar only works with switch in bridge position). I was like "What's the worst it could be?", thinking it might just be a loose wire. Well, it seems to be much more tricky than that.
Turns out no luthier wants to touch the thing either because it's too damn complicated. Given that I live in Germany, it's not a common model at all. Fernandes guitars…
Good solid, and very complete report. I have had touble with my Fernandes Sustain pickup, which came already installed on a used Fernandes guitar I bought to find out whether I liked the effect. The problem is that the sustain only kicks in maybe three seconds after I first pluck the string. That is too late for me to use on most music I play. There is probably some way to make it react sooner, but if so I haven't found it. Thanks again for your useful report!