How to assemble a Strat: Sonic Blue '62 (Part 1)
- Alex S

- Jun 5, 2015
- 4 min read
This and upcoming blog posts document the work done to assemble my '62 inspired Sonic Blue Strat. This is simply the procedure that I use to assemble Strats, documented here for my own benefit. There may be errors and better ways to do things - if so, let me know.
Body and Hardware
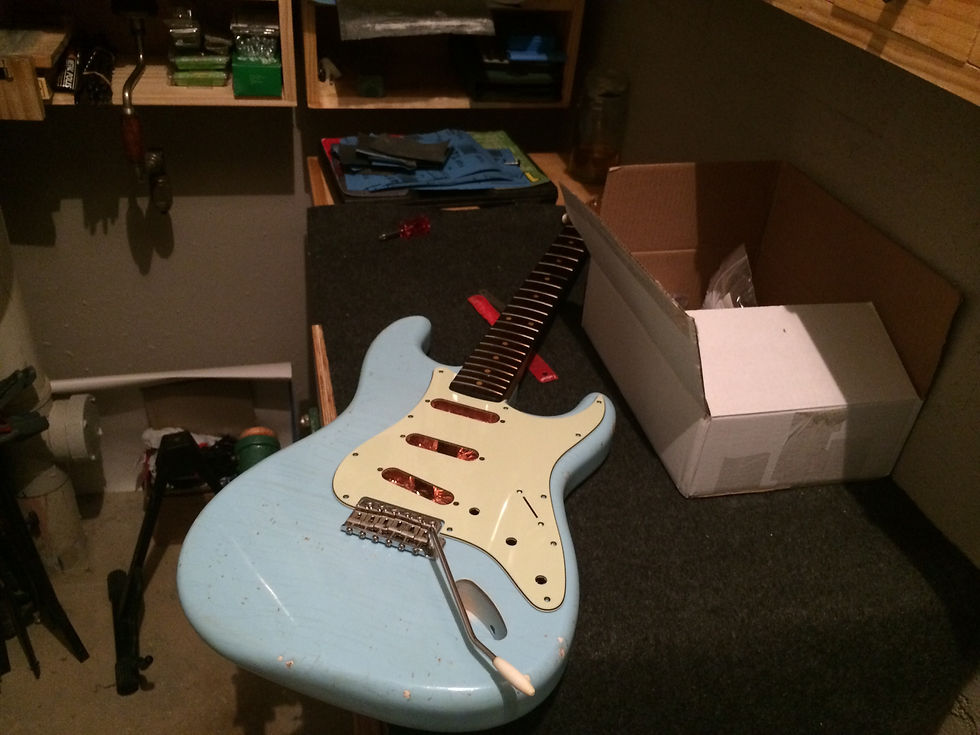
The first parts received were from MJT:
1 piece Swamp Ash body in Sonic Blue (Vintage aged)
Gotoh 6 Saddle Bridge
After a clean of the body and parts, I installed the bridge onto the body. Top side install is straight forward as the holes have been pre-drilled. Always remember to lubricate the screws if the holes have not been threaded. In this build I used paste wax, but I’ve used candle wax before and that works fine.
Following photo shows the installed bridge:

Once the top side install is done, the tremolo claw needs to be installed along with the springs. After that the bridge is fully installed and will need to be set up when the build is completed.
For the tremolo claw installation, there are two screws that go into the body which hold the claw. This claw is then attached to the tremolo block with some springs (3 in this case, some people use all 5). If there are no holes in the body they will need to be drilled:
Match the screw diameter with a drill bit that has a diameter that is slightly smaller than the screw’s. I like to use a drill bit that is smaller than the screw threads but roughly equal to the diameter of the inner “shaft” of a screw. Once the drill bit is decided, this will be the diameter of the pilot hole. This decision is not trivial – if the pilot hole is too big the screw will not fasten to the wood, if it’s too small the screw will not go in smoothly and you may have to apply too much force which may break the screw (you definitely don’t want that) or crack the wood (you DEFINITELY don’t want that). If in doubt, go with the smaller drill bit, try to fit the screw and if you find yourself applying too much force, redo the hole with a bigger drill bit.
Once a drill bit is chosen, mark out two spots for where the screws will go into the body. If unsure, look up photos of Strats online and see how these screws are positioned. Mark them out with an awl if you have one, this will make the start of the drilling much easier as it will avoid skipping when using the drill
Figure out how much of the screw will be screwed into the body – this will determine the depth of the hole. Remember that the tremolo screws are never screwed entirely flush into the body. Estimate the depth (it’s not essential that you get it exact, it’s ok to go deeper than your estimates) and mark that depth on the drill bit with a piece of tape.
Start drilling into the body. This is possibly the trickiest place on a Strat to use a drill, as there is not a lot of clearance. To solve this you can maybe use a right angle drill/attachment or angle the holes. I angled them. When drilling, do not drill the entire depth in one go, always go in stages so that the drill bit is backed out frequently. Backing out the drill allows the waste to be cleared from the hole and will keep the heat under control.
Once the holes have been drilled to the proper depth, wax up the screws and try installing them with a manual screw-driver. If you have to apply a lot of force in order to screw it in, redo the steps above with a larger drill bit. Once happy, back out the screws and install the claw and springs.
Sit back and admire your newly installed vintage tremolo.
That’s pretty much it – it sounds like a lot of steps but it actually only takes a few minutes. Remember that the tremolo claw does not have to be precision fitted. Relative to the bridge location or the neck pocket screw holes, the tremolo claw is fairly forgiving.


Body Shielding
While waiting for the other parts to arrive, I worked on the body shielding. I used adhesive copper tape. Both sides are conductive, which means that you can overlap them without soldering.
Installation of the shielding is fairly easy and should be instinctive to anyone trying it out for the first time. My only optional tips are:
Cut out the shapes for the cavity floor
Cut out strips for the cavity walls
Make sure all areas are covered
I like to leave a strip (or two) extending out of the cavity to contact with the pickguard shielding. Usually this will be over a screw hole so I am assured of contact.
I like to solder the strips together with blobs of solder, just to be sure that there is contact
Once done, perform a continuity test using a multimeter. Use the probes across different points to ensure that there is continuity across all shielded areas (i.e. there are no electrical breaks between two points).
Picture below shows the body shielding without solder points:
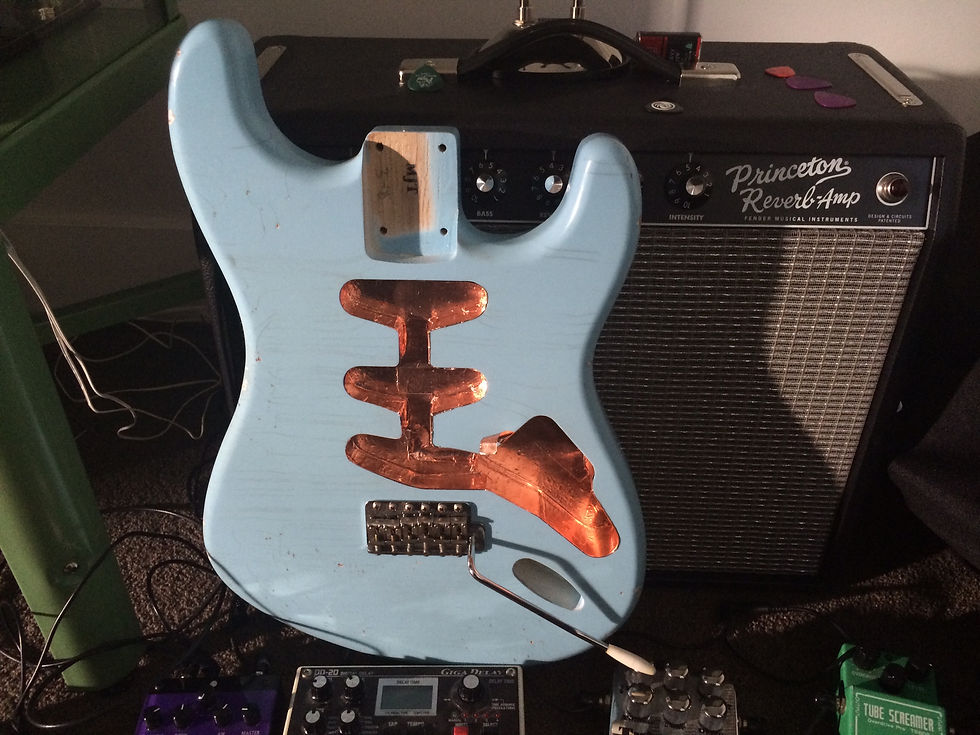
And this (below) shows the same thing, with soldering done on it. Note that the extender to a screw hole has not been added yet as the pickguard screws have not been mapped out yet.

I usually leave the input jack cavity unshielded.
To be continued....


Comments